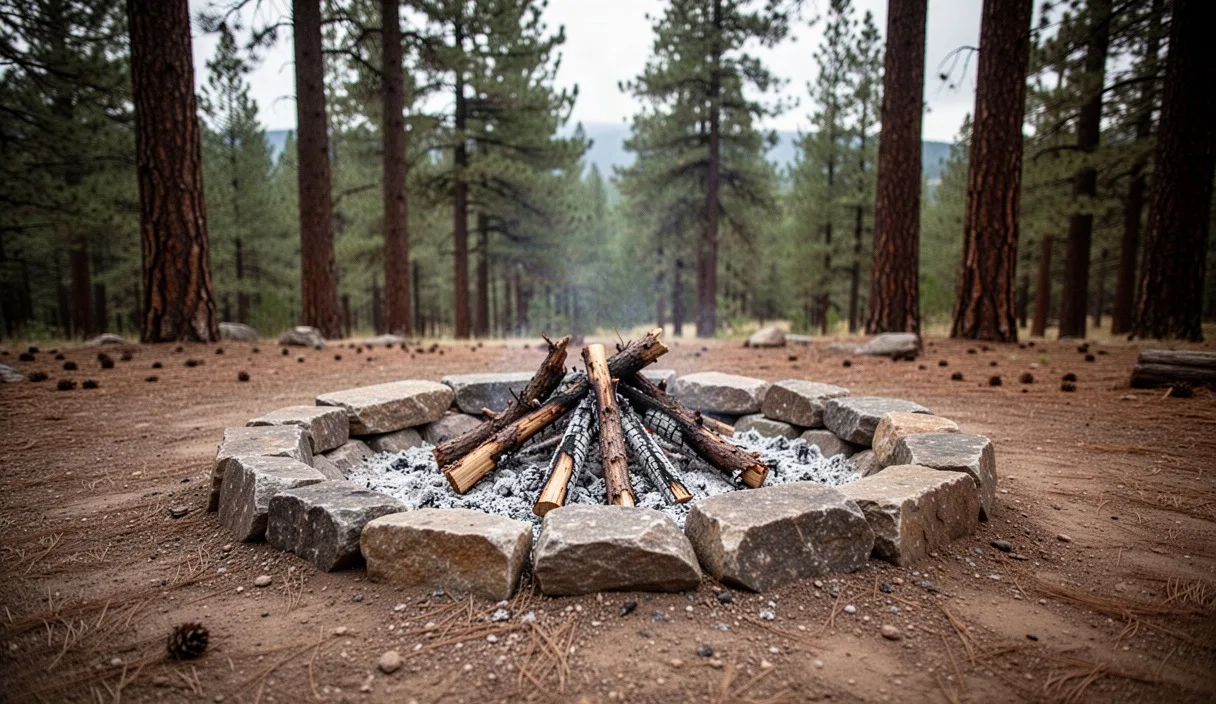
Rock terrain demands deliberate firecraft. Exposed stone benches, glacial till, and fractured basalt plates create deceptive firebeds where wind channels unpredictably and heat fractures mineral structures. Building a campfire ring in these environments requires evaluating stone density, scraping away organic material trapped in crevices, and accounting for updrafts moving across cliff bands and ridges. The goal is simple: contain every spark, burn fuel down to white ash, and leave zero heat signature on the underlying bedrock.
Regional rock plateaus often appear barren, yet they conceal heavy fuel loads. Pine needles, dried lichen, and decomposed wood pack into rock joints, creating continuous subterranean wick lines. If you ignite a fire over these hidden fissures, root fires can burn undetected underground for days. Safe construction hinges on proper rock selection, absolute clearing of mineral soils, and building stone walls that block prevailing gusts without trapping heat until the rock shears apart.
Selecting granite boulders over porous river stones
Pick igneous rock exclusively. Dense, coarse-grained granite, basalt, and diorite survive open flame because their crystalline structures contain minimal trapped moisture. Avoid sedimentary and metamorphic river rocks at all costs. Sandstone, shale, limestone, and river-polished cobbles contain porous pockets, microscopic fissures, and saturated internal voids. When temperatures exceed 212 degrees Fahrenheit, trapped water inside porous stones flashes instantly to steam, expanding by roughly 1,600 times its liquid volume. The resulting hydraulic pressure violently shatters the rock, throwing razor-sharp fragments up to 15 feet across your camp.
Source your building stones from high, dry ground well away from watercourses, talus drainage channels, and shaded depressions. Even a granite slab can hold surface water if retrieved from a seasonal creek bed or boggy depression. Tap two target rocks together firmly before hauling them to your pit. A solid stone produces a high-pitched ring or a clean clack. A dull, muffled thud indicates micro-fractures or water saturation, which disqualifies the stone from fire ring use.
| Rock Type | Density and Composition | Thermal Failure Risk | Field Suitability |
|---|---|---|---|
| Field Granite | Coarse grain, quartz and feldspar, dry upland source | Low: resists cracking up to 1,100 degrees Fahrenheit | Primary choice for ring perimeter |
| Dense Basalt | Fine grain, volcanic, low internal porosity | Low to moderate: stable under gradual heating | Excellent for windward backsplashes |
| River Quartzite | Metamorphic, rounded, harvested from stream margins | High: trapped interstitial moisture creates spalling | Never use in or near a fire zone |
| Limestone / Shale | Layered sedimentary, calcite matrix, high porosity | Extreme: explosive fracture and violent flaking | Unusable: structural breakdown under heat |
Select rocks between 10 and 20 pounds each, roughly the size of a loaf of bread or a small bowling ball. Smaller stones lack the mass to withstand shifting fuel logs, while oversized boulders require excessive physical exertion that tears up fragile alpine topsoil. You need between 8 and 14 clean stones to form an enclosed, stable circle with an inner diameter of 18 to 24 inches.
Clearing duff and root systems down to bare dirt
Scrape the ground down to mineral earth before placing a single stone. Duff consists of partially decomposed needles, leaves, bark fragments, and fungal mycelium resting directly above true dirt. On rocky terrain, duff accumulates deep inside bedrock cracks, sometimes reaching depths of 8 to 14 inches beneath what looks like solid rock. If embers make contact with this fibrous layer, the fire burrows beneath your fire ring, smoldering outward beyond the safety perimeter.
Establish a cleared perimeter measuring at least 10 feet in diameter around your prospective ring. Remove all dry grass, twigs, pinecones, and overhead branches hanging lower than 80 inches. Use an entrenching tool, a sturdy camp trowel, or a flat-edged stick to gouge out all organic matter down to bare mineral sand, gravel, or solid parent bedrock.
- Sweep a 5-foot radius down to true mineral soil using a branch or pack brush.
- Probe all visible rock fissures with a knife or metal tent stake to dislodge packed pine needles.
- Fill deep rock fissures within the hearth base with sterile mineral sand or crushed gravel.
- Check the clearance zone above the pit: ensure no tree limbs sit within a 10-foot vertical chimney.
Never build a fire directly on top of unverified bedrock without a protective base layer. Intense, concentrated heat causes exfoliation, a process where the surface layer of bedrock pops loose with explosive force due to rapid, uneven thermal expansion. Shovel a 2-inch bed of mineral sand or pulverized decomposed granite into the center of the ring. This sacrificial gravel bed insulates the underlying ledge and catches falling embers before they bake the stone floor.
Arranging windbreak walls to stop spreading sparks
Position your perimeter wall to counteract regional wind patterns. On exposed ridges, wind shifts downward off peaks after sunset as cold air drains into valleys. Determine this prevailing night breeze and construct the tallest portion of your ring on the upwind side. A well-built windward wall deflects surface drafts over the top of the coals, preventing incoming air currents from scouring the ash bed and scattering embers into adjacent brush.
Interlock your rocks using a staggered, two-tiered arrangement rather than a loose, single-layer border. Place your largest, flattest granite rocks along the base, bedding them 1 to 2 inches into the cleared mineral dirt to prevent shifting. Set the second tier across the seams of the bottom stones, similar to laying bricks. Chink the exterior gaps between larger stones using smaller fist-sized rocks and moist mineral soil. Leave small, finger-sized vents near the floor on the downwind side to feed enough oxygen to maintain a clean, low-smoke burn.
Cap the ring height between 10 and 14 inches from the interior floor. Walls shorter than 10 inches fail to trap drifting embers when logs roll or collapse. Walls higher than 14 inches block radiant heat from warming the camp, forcing you to build unnecessarily large fires. Keep the internal burn chamber compact: an interior diameter of 16 to 18 inches generates more than enough cooking heat while keeping fuel consumption low.
Drowning embers with the stir-and-soak rule
Extinguishing a fire on rocky ground takes significant volume, physical agitation, and time. Water is mandatory; burying a fire with dirt or sand does not extinguish it. Smothering embers with mineral dirt insulates the coals, maintaining internal temperatures above 600 degrees Fahrenheit for upwards of 18 hours. If the wind picks up and scours the dirt cap away the following afternoon, those sheltered coals immediately reignite dry leaves.
Execute the extinguishment sequence at least 40 minutes before leaving the site or going to sleep. Apply water in controlled batches using a bucket, pot, or hydration bladder. Use the following systematic technique to ensure zero thermal retention:
- Douse the perimeter rocks first to cool the stone mass and prevent perimeter reignition.
- Pour water directly onto the glowing center until the initial hiss and white steam subside.
- Churn the ash bed thoroughly using a heavy, non-resinous stick or an entrenching tool.
- Scrape all partially burned wood chunks, rolling them over to drench their charred undersides.
- Douse the ash slurry a second time, pouring water into the core until the pit resembles cold soup.
- Submerge your bare hand directly into the center of the wet ash to verify the absence of residual heat.
Expect to use between 3 and 5 gallons of water on a standard 18-inch campfire. If any portion of the pit feels warm to the back of your bare hand, it is not out. Continue adding water in half-gallon increments, turning the muddy sediment over from the bottom up until the entire hearth matches the ambient air temperature.
Scattering cold charcoal to restore campsite appearance
Dismantle the fire ring entirely if you are camping in an unestablished, pristine wilderness zone. Leaving blackened rock circles on bare plateaus invites secondary parties to build new rings nearby, sprawling the fire impact across the landscape. Once the hearth slurry is dead cold, break up large charcoal chunks into thumbnail-sized pieces by crushing them under boot heels or with a flat rock.
Collect the crushed charcoal and scatter it broadly across a 40-foot radius over durable ground. Dispersing the inert carbon across deep leaf litter, duff, or brush exposes it to sunlight, rain, and soil microbes, which incorporates the carbon into the soil profile without leaving an obvious black stain. Never dump all the charcoal in a single pile behind a boulder.
Return all building stones to the exact spots where you collected them. Flip every rock so that the soot-blackened side faces downward toward the dirt, allowing rain and ground organisms to clean off the carbon wash. Scrape the insulating bed of sand back over any scorch marks on the ground. Rake native pine needles, small stones, and dead organic debris across the cleared clearing using a leafy bough to eliminate your footprints and mechanical shovel marks.
Common mistakes
Rushing the extinguishment process stands as the most frequent and dangerous error. Pouring a single water bottle over a bed of red coals creates a thin crust of damp ash while the lower core remains white-hot. Always dig down to verify that water has reached the base substrate.
Other routine missteps include:
- Selecting stones directly out of running or standing water, causing violent steam explosions.
- Failing to dig through duff pockets hidden inside rock fractures beneath the hearth.
- Constructing oversized fire rings that demand heavy logs, producing unmanageable ember fields.
- Covering hot coals with dry sand instead of drenching them with liquid water.
- Leaving fire rings intact in pristine areas, which permanently alters wild bedrock aesthetics.
- Building directly beneath low-hanging conifer limbs that dry out and ignite from rising heat plumes.
Practical next steps for regional trips
Check regional fire restrictions before packing your vehicle. Land managers, state forestry divisions, and federal agencies implement seasonal bans that override all field-craft techniques. If Stage 1 or Stage 2 fire restrictions are active, do not construct a rock ring; carry an approved, self-contained canister stove or an elevated, fully enclosed portable fire pan that prevents any hot material from contacting the ground.
Inspect your tool kit before departure. Pack a metal-headed trowel or folding spade capable of gouging through decomposed granite and packed duff. Include a dedicated collapsible water bucket with at least a 3-gallon capacity so you do not have to rely on small personal water flasks when extinguishing your pit. If water sources are scarce at your planned camp, calculate your fire-drowning requirements ahead of time and haul that water in dedicated utility jugs. If you cannot spare the water to extinguish it completely, do not light the fire.