Low-flow streams demand deliberate technique. When a regional creek slows to a trickle during late summer or an autumn dry spell, suspended silt, decomposing leaf litter, and concentrated agricultural runoff turn simple water collection into equipment failure. Pushing turbid water straight into a hollow-fiber filter fouls the membrane in seconds, spikes internal pressure, and leaves you stranded with a failed kit. You need a structured collection and treatment workflow before water touches your primary filter cartridge.
Every basin presents different mineral loads and bacterial threats. In dry months, animal traffic concentrates around dwindling surface pools, drastically increasing Giardia cysts, Cryptosporidium oocysts, and coliform counts per liter. Relying on a single line of defense under these conditions invites gastrointestinal infection or equipment destruction. The following protocols protect your gear, lower turbidity levels, and ensure your chemical agents work within their required reaction envelopes.
Finding the deepest pool in shallow stream beds
Walk downstream toward natural bedrock transitions or sharp channel bends. Water depth pools where erosion-resistant strata force flow to stall before dropping over small ledges, or on the outside curves of dry meanders where scouring occurs during high-water events. Avoid flat, pebble-covered shallows where surface water is less than 3 centimeters deep. Drawing from extremely thin water columns drags mineral sediment off the floor and skim oils off the surface tension layer directly into your reservoir.
Look for undercut banks shaded by mature alder, willow, or hemlock roots. Root wads stabilize soil and allow scour holes to persist long after the main riffles dry up. If surface water disappears entirely, scan the dry gravel bar for patches of damp dark sand. Sub-surface flow often continues through the gravel alluvium 10 to 30 centimeters beneath the dry bed surface. Digging a temporary seep basin in gravel yields cleaner water than stagnant, algae-choked surface puddles.
When you locate a pool with adequate depth, assess the bottom composition and water movement:
- Bedrock bowls: Best option. Solid stone bottoms contain little movable silt. Clear out surface leaves gently with a stick and let the basin settle for 8 minutes before drawing.
- Gravel depressions: Good stability. Water percolates through pebbles. Minimize foot contact within 2 meters of the depression to avoid kicking up clay fines.
- Silt or mud basins: High risk of instant clogging. Do not submerge your collection vessel directly. Create an offset collection hole 30 centimeters away in adjacent sand and allow water to seep across the soil barrier.
- Culverts and plunge pools: Man-made structures often retain deep water pockets. Inspect upstream within visual range to confirm no decaying animal carcasses are pinned against the culvert intake.
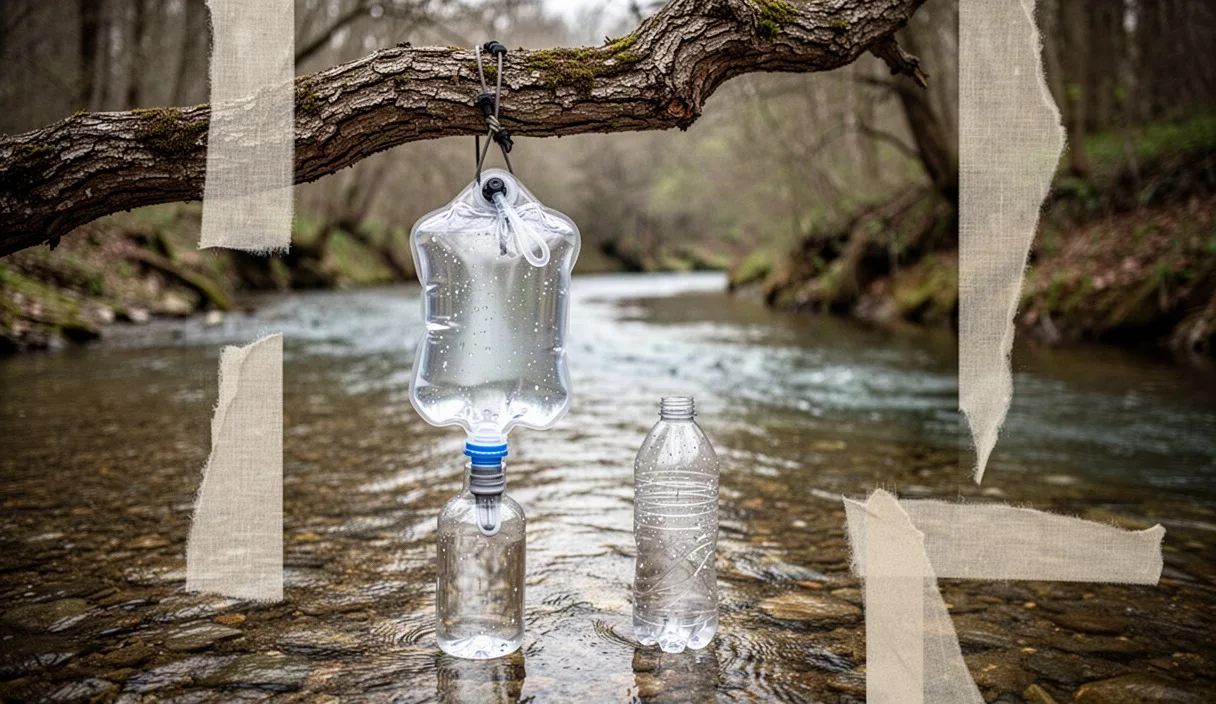
Use a rigid 1-liter scoop or cut-down plastic water bottle to skim water from just below the surface film. Do not push your collection bag directly into shallow stream substrate. Lower the scoop horizontally, skim the top 2 centimeters of the water column without breaking the bottom sediment layer, and decant the liquid into your dirty water bladder.
Building a natural sand and cloth pre-filter
Raw stream water with visible cloudiness requires physical settling and coarse filtration before it enters a micro-pore membrane. An effective field-expedient pre-filter removes macroscopic silt, sand grains, suspended algae, and plant detritus. This process will not eliminate microscopic pathogens or chemical residues, but it prevents early mechanical failure of your hollow-fiber or ceramic media.
Construct a gravity pre-filter using a cut-bottom plastic bottle, a clean bandana, or a packable nylon dry bag with an outlet. Secure a piece of tightly woven cotton or a paper coffee filter over the narrow neck of your container using an elastic band, cord, or zip tie. This retains the media layers inside the housing while permitting liquid flow.
| Media Layer | Material Selection | Layer Depth | Primary Function |
|---|---|---|---|
| Top (Intake) | Coarse pea gravel or small river stones | 3 to 5 cm | Baffles water pour; stops large detritus and leaves |
| Middle | Coarse to medium quartz sand | 6 to 8 cm | Traps fine silt, suspended clay flakes, and grit |
| Base | Washed fine sand above tightly folded cloth | 4 to 6 cm | Final particulate scrub before exit nozzle |
Rinse the natural sand and gravel media with several liters of stream water before collecting usable output. Fresh river sand contains microscopic dust that will muddy your output if not flushed thoroughly. Pour raw water gently onto the top gravel layer using a flat stone or wide stick as a splash plate, preventing the water stream from carving a channel straight through your sand bed.
Allow the pre-filtered liquid to rest in a dedicated settling bladder or cook pot for 25 to 40 minutes. Gravity drops remaining colloidal particles to the floor of the vessel. Decant the clear supernatant liquid carefully off the top, leaving the bottom 3 centimeters of turbid slurry behind. This settled liquid is now prepared for micro-filtration.
Operating squeeze filters without membrane blowouts
Hollow-fiber cartridges such as the Sawyer Squeeze, Platypus QuickDraw, or HydroBlu ClearQuest utilize bundles of straw-like tubes with microscopic side pores ranging from 0.1 to 0.2 microns. These fibers withstand high internal pressure, but aggressive hand squeezing on a clogged membrane generates hydraulic forces exceeding 30 pounds per square inch. This pressure can breach the fiber walls, blow internal gaskets, or cause channeling, which lets pathogens pass through undetected.
Do not wring, twist, or kneel on dirty water bladders. Twisting applies uneven rotational shear stress to the neck threads of the filter and spikes bladder pressure unevenly. Instead, use a steady, flat-handed roll from the base of the bladder toward the neck, similar to rolling a tube of paste. If water resistance requires you to brace the bladder against your chest or thigh to force a drip, stop immediately. High resistance indicates the fiber surface is caked with fines.
Monitor the exit flow rate as an indicator of membrane health. A clean 0.1-micron hollow-fiber cartridge processes 1 liter of clear water in approximately 45 to 65 seconds under moderate hand pressure. When processing takes longer than 2.5 minutes per liter, mechanical strain is critical.
Cold weather compounds pressure hazards. At temperatures near freezing, water viscosity increases, raising resistance across the porous membrane by 20% to 30%. Never force freezing water through a stiff cartridge. Keep the filter in an internal jacket pocket next to your body core for 15 minutes before filtering to warm the plastic housing and soften remaining moisture.
Chlorine dioxide dwell times in cold water
Low-flow streams in late season often drop below 5 degrees Celsius. Water temperature dictates the efficacy of chemical treatment. Halogens and oxidative agents like chlorine dioxide lose reaction speed dramatically as temperatures decline. While hollow-fiber filters remove bacteria like Escherichia coli and protozoan cysts like Giardia, they do not retain waterborne viruses. Where viral contamination from human waste or livestock runoff is suspected, secondary chemical disinfection is necessary.
Chlorine dioxide functions by oxidizing cellular structures of microorganisms. It penetrates the tough, thick outer shell of Cryptosporidium oocysts, but the reaction rate is a direct function of temperature, pH, and concentration. Using warm-water dwell guidelines on mountain runoff will lead to under-treated water.
| Water Temperature | Target Pathogen Group | Standard Dose | Required Dwell Time |
|---|---|---|---|
| Above 20 deg C | Bacteria and Viruses | 1 tablet / 1 drop set per L | 15 minutes |
| Above 20 deg C | Cryptosporidium parvum oocysts | 1 tablet / 1 drop set per L | 4 hours |
| 4 to 10 deg C | Bacteria and Viruses | 1 tablet / 1 drop set per L | 30 to 45 minutes |
| 4 to 10 deg C | Cryptosporidium parvum oocysts | 1 tablet / 1 drop set per L | 8 hours |
If treating water pulled from a cold autumn pool near 4 degrees Celsius, mix the two-part liquid chlorine dioxide solution (sodium chlorite and phosphoric acid activator) in the small mixing cup provided. Wait the full 5 minutes for the mixture to turn a deep yellow-amber, signifying complete generation of chlorine dioxide gas, before dosing the water volume.
Insulate the treated container. Place your treated bottle inside an insulated jacket, wool sock, or sleeping bag to prevent the water from dropping closer to 0 degrees Celsius overnight. If your timeline does not permit an 8-hour dwell for suspected Cryptosporidium in near-freezing conditions, bring the water to a rolling boil for 60 seconds (or 3 minutes at elevations above 2000 meters) instead of relying solely on cold chemical processes.
Backwashing the filter cartridge in camp
Backwashing is not an end-of-trip maintenance chore; it is an active camp routine when working low-flow sources. Backwashing reverses clean water through the clean exit port back out through the dirty intake port, dislodging the particulate cake that builds on the outside of the fibers. Failing to backwash after processing turbid pools causes silt to dry and set like mortar inside the cartridge housing.
Execute this field cleaning protocol every time you finish processing your daily camp supply:
- Isolate clean water: Ensure you have at least 500 milliliters of thoroughly filtered, potable water set aside. Never backwash a filter using raw, unsettled stream water. Doing so introduces bacteria directly to the clean interior fibers.
- Affix the backwash tool: Thread your cleaning coupling ring or draw filtered water into the high-volume backwash syringe included with your kit. Ensure a leak-free seal against the drinking spout.
- Deliver rapid hydraulic pulses: Do not push the syringe plunger with slow, even pressure. Rapid, forceful pulses of water dislodge wedged sediment much more effectively than continuous flow. Drive three separate 50-milliliter blasts through the cartridge.
- Inspect the discharge: Direct the backwash waste into a clear cup or onto a dark rock. Observe the water exiting the intake. It will typically emerge cloudy, yellow, or grey.
- Repeat until clean: Continue pulsing clean water through the spout until the discharge runs completely transparent and free of visible grit.
- Expel free water: Shake the filter briskly downward against your wrist several times to cast out standing water trapped within the housing. This prevents mold growth and reduces freezing risks inside the shell.
Store your cleaned filter inside a sealed zip bag in your pack, close to your back panel. If night temperatures are forecast to drop below 0 degrees Celsius, keep the filter inside your sleeping bag footbox. If wet hollow fibers freeze, expanding ice crystals puncture the microscopic membrane tubes. A cracked membrane provides zero protection against pathogens while offering no external structural signs of damage.
Common mistakes
- Dropping the intake hose in the silt: Allowing a weighted pump intake to sink into soft mud draws pure slurry into the pre-filter screens within the first three strokes.
- Squeezing dirty bags over open clean bottles: Stray droplets running down the exterior of a dirty collection bladder can drop into the clean bottle neck, contaminating treated water. Always wipe the exterior of the dirty bag dry before filtering.
- Cross-contaminating coupling caps: Storing clean-side drink nozzles loose in the same pack pocket as dirty collection bladders transfers microscopic bacteria directly to the mouthpiece.
- Assuming clear water is safe water: Low-flow stream pools often look pristine because particulates have settled out over days. Dissolved animal feces and pathogenic cysts remain suspended in clear, still pools.
- Failing to replace cracked O-rings: The silicone gasket inside the female threads of your squeeze filter prevents dirty reservoir water from bypassing the membrane and leaking down into your clean container. Inspect this ring for flat spots, cracks, or missing seals before every journey.
Immediate field checks
Audit your water filtration equipment right now before stepping onto the trail. Fill your kitchen sink, attach your squeeze cartridge to its primary reservoir, and evaluate the flow rate using clean tap water. If the resistance feels stiff or processing a single liter takes more than 90 seconds, run an extended warm-water soak (under 40 degrees Celsius) and execute five sequential syringe backwashes to restore baseline flow.
Pack a secondary, non-mechanical backup. Carry chlorine dioxide tablets rated for your expected water volume, alongside a 28mm thread adapter or secondary backwash gasket. If you contract an acute waterborne illness or develop persistent gastrointestinal symptoms such as severe cramping, nausea, or diarrhea after processing wilderness water, consult a qualified medical professional immediately rather than relying on self-treatment.