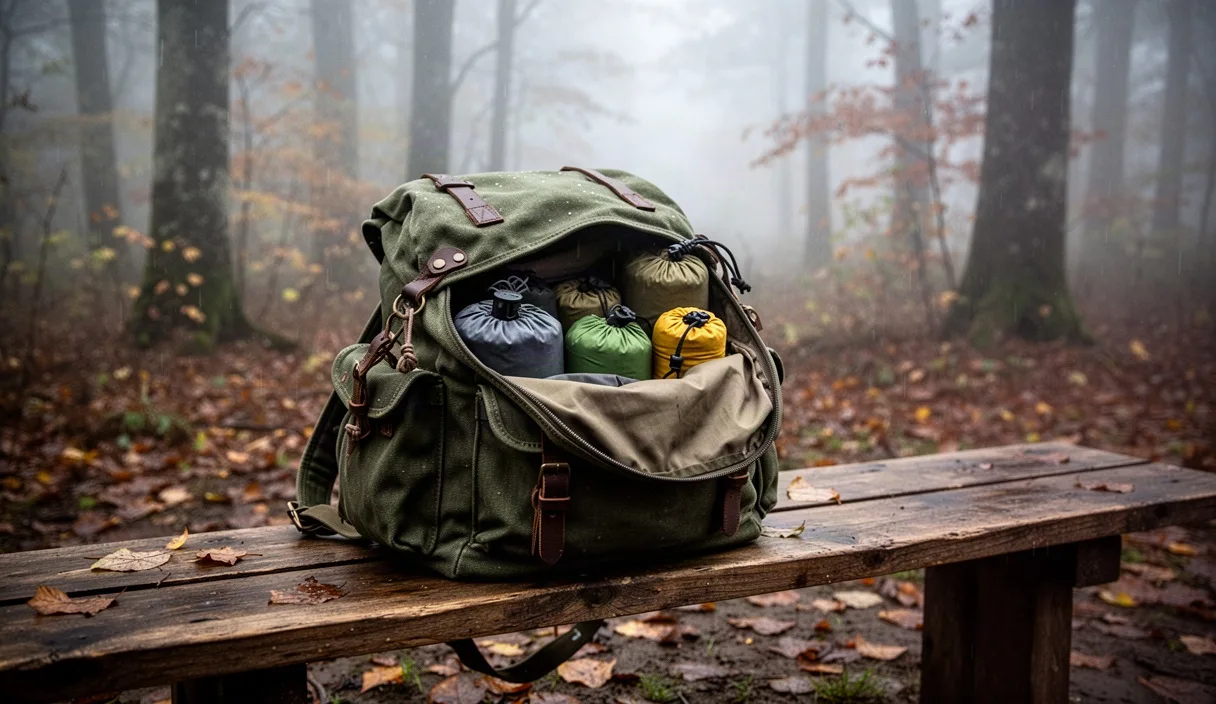
Pack a 20-liter ruck tight for wet autumn woods. Sustained rain, temperatures between 35 and 48 degrees Fahrenheit, and early dusk reduce your margin for error. A small daypack forces hard choices. You cannot carry redundant dry sacks, heavy frame sheets, or spare outfits you will not use. Every item must sit where you can access it without dumping the main compartment onto waterlogged trail dirt.
Water intrusion ruins autumn outings fast. Cold rainwater chills insulating garments, dampens electronics, and turns emergency layers into dead weight. Organizing twenty liters of interior volume demands deliberate packing order, durable internal waterproofing, and clean separation between soaking shells and survival insulation. Follow this method to build a compact, balanced loadout that keeps dry gear dry through miles of driving precipitation.
Selecting an interior waterproof liner
Ruck fabrics leak through seams. Coated nylon and polyester shells resist mist, but steady autumn rain penetrates needle holes, zipper coils, and panel joints within forty-five minutes of steady exposure. Exterior rain covers flap in high winds, snag on bare branches, and pool water against your lower lumbar back panel. An internal liner creates a reliable waterproof barrier against complete saturation.
Heavy-duty trash compactor bags provide the most reliable liner for twenty-liter packs. Standard kitchen trash bags tear on interior pack seams or pointed multi-tools. Contractor-grade garbage bags add unnecessary bulk inside a tight 1200-cubic-inch space. A dedicated 18-liter silnylon or 1.43-ounce Dyneema dry bag works well, though a 2.5-mil white compactor sack costs far less, reflects ambient light so you can view pack contents, and conforms precisely to internal pack contours.
| Liner Material | Weight in Grams | Durability Profile | Pack Conformance |
|---|---|---|---|
| 2.5-mil Trash Compactor Bag | 45 to 55 | Puncture-resistant, lasts a full season | Fills internal corners cleanly |
| Silnylon Roll-Top Dry Sack | 35 to 60 | High tear strength, low abrasion tolerance | Rigid cylinder shape robs corner space |
| Standard Kitchen Bin Liner | 12 to 18 | Fails under point friction within hours | Loose, snag-prone |
| Dyneema Composite Fabric (DCF) Sack | 22 to 38 | High tensile strength, degrades at creased folds | Moderate flexibility |
Seat the liner bag deep into the bottom of the empty ruck. Push your fists into the lower corners to expand the bottom folds against the fabric shell. Keep the top of the liner open and rolled back over the ruck collar while you load dry gear. Once your insulated layers, first aid kit, and emergency supplies are seated, compress the air downward out of the liner, spin the neck five full turns, and fold the tail down along the front wall of the daypack.
Arranging mass close to your lumbar center
Heavy loads pull your shoulders backward. When you walk across slick, leaf-covered shale or muddy slopes, bad balance forces your core to work twice as hard to maintain upright posture. In a 20-liter ruck lacking a load-bearing hip belt, the densest items must ride against your back, positioned between your lower ribcage and your sacrum.
Water and dense foods represent the bulk of your carry weight. A single liter of water weighs 2.21 pounds, while a compact personal first aid kit, tool kit, and dense food cache can easily add another 3 to 4 pounds. If you put that dense weight at the top or against the outer front pocket, the pack creates a lever that pulls you off balance on wet root steps. If you put it dead flat on the floor of the pack, it sits below your hips and drags on your lower back muscles.
- Floor of the pack: Featherweight bulk. Place your ultralight down or synthetic puffy jacket inside the liner at the absolute bottom. It creates a stable, vibration-dampening shelf.
- Mid-back against the spine: High-density cargo. Slide your water reservoir, dense food bag, and compact emergency kit right here.
- Mid-back away from spine: Medium-density items. Pack your spare wool mid-layer socks, dry trail gloves, and fleece beanie here to push the dense gear firmly forward against your spine.
- Top collar inside liner: Headlamp, fire-starting kit in a small pouch, and fragile electronics that must stay completely dry.
Keep your total pack weight, including water and fuel, between 11 and 15 pounds for day operations. Weigh each gear group on a digital postal scale before packing. Extra ounces compound across steep vertical miles, especially when rain adds surface weight to the outer nylon shell and boots.
Separating wet shells from dry insulated layers
Never place a wet hardshell inside your dry liner. When trail squalls stop, body heat drives sweat through base layers, forcing you to strip off your waterproof jacket. Shoving that dripping 3-layer shell into the main pack compartment exposes dry mid-layers to condensation and trapped moisture. Wet insulation loses loft and thermal retention rapidly.
Use the ruck's external front mesh pocket or exterior shock cord web for rain garments. Autumn rain gear should cycle directly between your torso and the outside of the ruck. If your 20-liter pack lacks an external drop pocket, store your wet outer shell in an unsealed, silicone-coated stuff sack tucked directly between the sealed internal liner bag and the outer ruck lid. That isolates the fabric wetness from your core survival layers.
Dry-side preservation requires rigid adherence to a split packing protocol:
- Seal the interior zone: Complete your liner closure before dealing with wet gear. Once folded and secured, do not reopen that dry sanctuary under falling rain.
- Drain the outer zone: Store your rain jacket, wet pack covers, and rain pants in mesh outer pockets. Ensure the drain grommet at the bottom of the external pocket remains clear of spruce needles and silt.
- Manage dripping accessories: Stash wet waterproof shell mittens and helmet covers in outer side pockets alongside water bottles, never inside the pack body.
- Keep an interim towel accessible: Carry a 15-gram microfiber cloth in a zip-seal sandwich bag inside an external pocket. Use it to wipe your hands, neck, and face dry before reaching into internal pockets for maps or dry items.
Stowing high-calorie food for walking consumption
Autumn rain cuts your rest breaks down to minutes. Stopping for a sit-down meal in 40-degree rain cools your core temperature rapidly, triggering shivering and fine-motor failure in your fingers. You must fuel your body while maintaining a steady hiking cadence. Organize calories so you can retrieve and consume them with one hand without removing the ruck from your back.
Standard daypack hip belts or shoulder straps often carry small zippered gear pockets. Allocate these pockets entirely to trail fuel. Cold autumn air hardens chocolate and dense energy bars into jaw-breaking slabs. Select rations that remain chewable at low temperatures: nut butter squeeze pouches, soft fig bars, salted nut mixes, and meat sticks. Target between 300 and 420 calories per hour of active movement, especially when navigating continuous ascents.
| Food Type | Calories per Ounce | Cold-Weather Texture | One-Hand Accessibility |
|---|---|---|---|
| Nut Butter Squeeze Packets | 160 to 180 | Remains pliable if kept in chest pocket | High; tear notch with teeth |
| Rolled Oat and Date Bars | 110 to 130 | Firms up slightly, stays chewable | High; peel wrapper back halfway |
| Dense Whey Protein Bars | 100 to 120 | Freezes solid below 45 degrees F | Poor; requires two hands to break apart |
| Salted Macadamias and Raisins | 140 to 170 | Loose, unyielding to temperature changes | Moderate; best fed from a wrist flask |
Keep your day's walking rations inside two distinct zones. Load your immediate pocket cache with 800 to 1000 calories at the trailhead. Store a secondary 1000-calorie reserve pouch inside the upper lid pocket or just under the top storm flap of the ruck. If severe weather extends your trip into the night, you can transfer food from the reserve to your torso pockets during a single sixty-second water break.
External lashing points for muddy trekking poles
Scrambling up steep root systems or talus in rain requires two free hands. When you pack trekking poles away, their lower shafts carry gritty trail mud and wet decomposed leaves. Shoving dirty poles into an interior pack pocket ruins fabrics, jams zippers, and introduces moisture to clean gear. Secure them strictly to exterior attachment points.
Most 20-liter technical rucks offer lower tool loops and upper elastic retention cords. Collapse your poles completely. Shorten three-section telescoping shafts to their minimum length, or fold Z-poles and lock the bundle with their integrated velcro wraps. Point the carbide tips downward toward the bottom of the pack to protect your eyes, face, and clothing from sharp steel edges while moving through brush.
Lock poles down against pack oscillation using this sequence:
- Seat the tips: Drop the carbide tips down through the lower webbing loop or ice axe cradle at the base of the pack.
- Rotate the shaft: Flip the pole shaft upward 180 degrees so the strap loop rotates tight around the lower basket, trapping the tip against the lower corner of the pack.
- Fasten the upper shaft: Capture the upper grip sections beneath the top elastic keeper cord. Pull the cord lock tight until the poles cannot wobble sideways.
- Secure pole straps: Loop the wrist straps around the pole grips and cinch them down. Loose, flapping straps catch on low-hanging autumn alder branches and pull you off balance.
If your ruck does not have purpose-built trekking pole loops, use the side compression straps. Slide the pole shafts down behind both upper and lower side straps, resting the pole baskets on the lower strap to prevent the pole from slipping downward through the webbing toward your calves.
Common mistakes
Avoid these frequent packing errors that undermine gear performance on wet trails:
- Relying on water-resistant zippers: Coated zippers keep out light road spray, but wind-driven rain pushes water through the seam tape and slider gaps. Treat external pockets as wet zones unless lined separately.
- Burying your lighting gear: Autumn daylight drops fast, particularly under heavy rain clouds. Packing your headlamp inside the bottom of your dry liner forces you to unpack your insulation in dark, wet conditions. Secure the light in the top pocket.
- Carrying loose cotton garments: Wet cotton absorbs four times its dry weight in water and provides zero thermal protection once damp. Use merino wool, grid fleece, or polyester base layers exclusively.
- Forgetting head and hand storage: Shoving soaked gloves into shell jacket pockets chills your core. Use breathable side pockets or chest straps to keep gloves accessible without soaking your inner clothing layers.
- Failing to test liner sizing at home: An oversized liner bunching up inside a 20-liter pack robs critical interior space. Size the liner so it lies flush against the pack interior walls without multiple heavy folds.
Pack your gear and check the weather
Empty your 20-liter ruck onto a dry floor today. Check the seams for loose thread tension, clean old grit out of zipper tracks with an old toothbrush, and cut a fresh trash compactor bag to fit your pack height. Assemble your clothing layers, emergency gear, and rations on the carpet and weigh them as a complete unit.
Check the barometric trend and mountain forecast thirty minutes before leaving for the trailhead. If trail conditions threaten severe hypothermia, flash flooding, or high-elevation freezing rain, re-evaluate your planned route or turn around early. Pack with care, keep your insulation isolated, and secure your thermal reserve before your boots touch wet ground.